

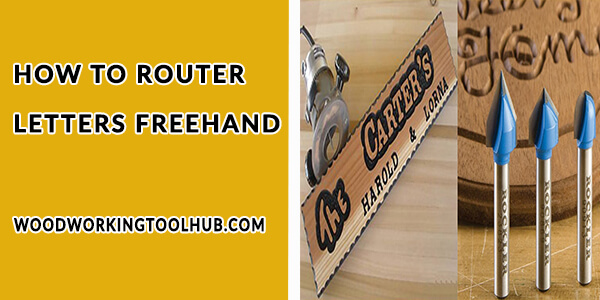
How to Router letters Freehand | A Step By Step Guide!
Routers are so fantastic that you will get baffled with the numerous uses of the utility power tool. One of such excellent advantage of a router is to use it for freehand routing letters. The letter or word sign can be used for many innovative works. You may use it as a sign, and as a personal touch to your home or gift box. That will surely add an extra flair to your design works.
The best part of these letters is that you can use a router to carve the letters freehand. It’s a relatively easy and comfortable task. Yet, I am going to describe how to router letters freehand for a wide range of works.
You will know freehand letter routing procedure, quick tricks, and safety measurements so that your letter freehand router lettering carving experience becomes smooth and enjoyable and best router bit for cutting letters.
Pre-Activities of Your Letter Routing:
The first thing comes first. You must know that only the Plunge router is suitable for routing letters in wood. It is because this power tool saves the edge. You will also need clamps to secure your wooden template.
It would help if you also prepared yourself before you begin carving letters from a block of wood using a plunge router.
- Selecting the appropriate router size: Not all routers will fit into your required size for letter routing. So, decide how large or small your carved letters would be and select your router’s edge size according to you.
- Marking workpiece: Since you will be exercising freehand letter routing without a letter or sign template, you will need to mark the wood. You can use a regular pencil to trace the letter on your wooden workpiece. It ensures an even cut and also lessens workload.
Additionally, you may create two spacing lines to create your letters in between these two lines. The most appropriate space is near about 10 mm. But the size may vary according to your letter size.
- Securing your workpiece: When you use a plunge router , movement of the workpiece may destroy your work or reduce the quality of your work. So, it would be best if you clamped your workpiece using a clamp. It will ensure safe and smooth routing.
However, when you place your clamps, make sure it won’t interfere with your work directly at the time of routing.
- The direction of routing: We advise you to router letters always in a clockwise direction. This will make your routing task convenient and less time-consuming.
Note :
If you are preparing for routing large letters, take some break once in a while. It will help you preserve your energy and perform better. Furthermore, make sure the plunge router doesn’t get too warm. You may alternatively use cooling oil to keep the router cool and continue working.
Start Routing Letter:
Now that we have taken a full proof preparation for routing some stylish looking letters using a router, its time to start the letter carving process.
So, let’s see what steps we should follow to router the letter freehand .
Setting Up Your Router:
At first, you will have to fit the router base or base plate with the router guide bush. It ensures that your routing becomes smooth.
After that, you should fit the router collect with the cutter. The cutter height should match perfectly with your desired cutting depth. Experts recommend that a 2-3mm depth is ideal for most letter routing applications. Anything beyond it may look odd and create an eyesore.
Positioning Your Router:
If you are convinced that your router is ready for carving letters with appropriate depth, post it carefully on your previously drawn pencil trace or in between the two spacing lines. It will allow the router guide to fit in the first cutting aperture.
Switch Your Router on And Start Working:
Next, you should switch on the router. But don’t drag it directly on the wood as soon as it is switched on. Wait for few seconds to allow the plunge router to get to its full strength. Now slowly place it on the wooden surface so that the router bit touches the wood surface.
After that, you need to activate the router lock so that it can start the routing process. While you continue routing, make sure your direction is the same as the clock moves. The clockwise direction helps you cut easily around the edge of your letters or characters.
Finishing the First Letter Routing:
You need to switch off the router when you reach the end of your first carved letter. But don’t move the router bit immediately.
Instead, wait with patience for a few seconds so that the router bit stops completely. Then, release the router locking system and safely remove the router bit from your workpiece.
Repeat the Process for Other Letters as Well:
If you are to make several letters with a plunge router, you need to move your workpiece and tighten with the clamp every time you start routing a new letter. So, once you are done with one letter, remove the clamp, place the next letter under the router and tighten the clamp.
Cleaning of The Routed Letter:
As you will router around the desired letter or number, a lot of dust and projectile will pile up around your workpiece and on the character itself. Use a torn piece of cloth to remove all those specks of dust and projectiles form your recently carved letters.
This will help you to see whether or not; your routing has been perfect.
Finishing Your Routing Task:
Once you are done with your letter routing job, remove the router and store it in a safe place. Remove your carved letters from the clamp and see what an impressive sign or character you have routed. Give yourself a pat, mate.
Precautionary Measures:
- Never hurry as you continue your routing. It may impact on your routing quality.
- Always use protective gear for routing such as safety goggles and protective boots to save yourself from any unwanted moments.
- Keep an eye on your plunge router temperature. It shouldn’t get too warm at the time of working.

Share this Image On Your Site
How to Use a Router Freehand – The best guideline with videos
Final Words:
Routing a letter freehand isn’t a Herculean task. This in-depth step by step guideline on how to router letters freehand should come handy for your letter routing procedure.
So, when you give your friend a birthday gift or wish to give your sweet home a name, use this routing technique to create beautiful letters. Good luck, buddy.